Sewing & Optional Materials
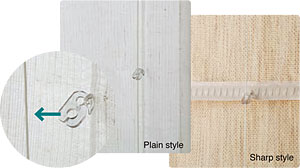
• RS Cord Adjuster S
The Cord Adjuster in separating when force is applied. It can be easily restored even if it comes off.
![]()
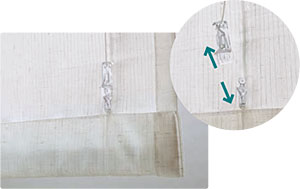
• RS S-shaped Ring for Cord S
If a child’s hand or head gets tangled in the cord, the cord detaches from the tape ring when force is applied. Installation with RS Cord Adjuster S will further reduce danger.
![]()
• RS Loop Tape Detachable
Easy removal and installation make it easier than ever to wash and care for the fabric. It has no hassle to remove the Lift Cord from the RS Cord Adjuster N and to level the shade.
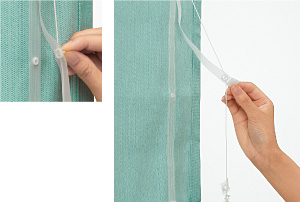
The RS Loop Tape Detachable is integrally connected to the Lift Cord, RS S-shapeded Ring, and RS Cord Adjuster N. No adjustment required after installation.
 |
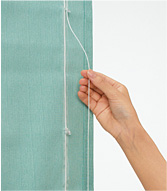 |
Before the Lift Cord had to be removed from the Ring and Cord Adjuster, which required adjustment after installation. |
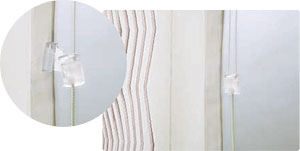
• Cord Stop S
A safety mechanism in the upper part of the operation cord (circled) Cord Stop S will detach to eliminate danger when force is applied.
![]()

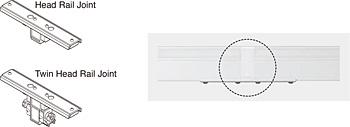
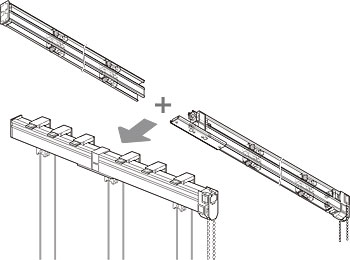
• Head Rail Joint / Twin Head Rail Joint
Use the Head Rail Joint to easily carry large rails into a
room in divided sections.
Reassemble the sections in a
few easy steps just before installing.
A Twin Head Rail Joint is also available.
The packing size is reduced to half that for large rails,
for high portability.
Allowable Size
| Product Name | Width | Hight | Maximum Shade Weight (Including sewing materials) |
| Creaty Drum Type Twin One Chain |
2,010– 4,000 mm (79–157″) |
480– 4,000 mm (19–157″) |
8 kg (17.6 lb) |
| Creaty Drum Type Gear |
8 kg (17.6 lb) | ||
| Creaty Drum Type Clutch |
5 kg (11 lb) |

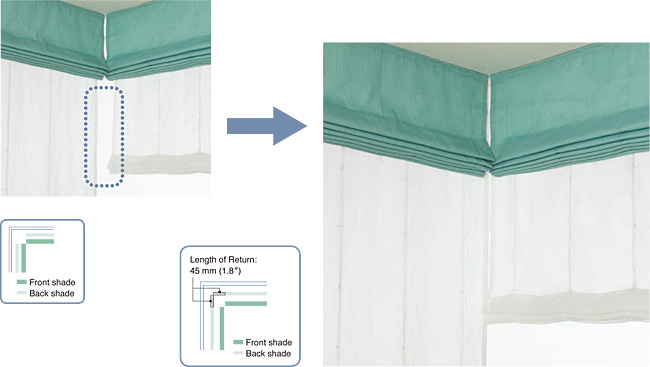
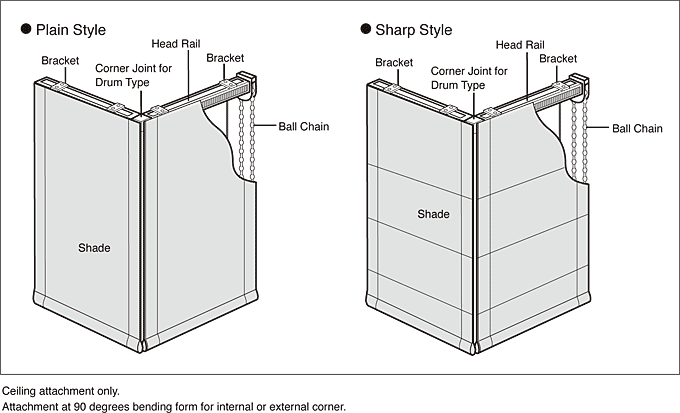
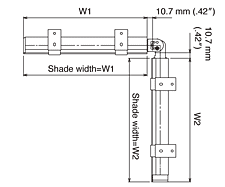
• Corner Return
Corner Return provides a useful function for twin shades in corner windows.
Corner Return widens the back side of the screen to block outside light by filling in the gap between the shades in the corners.

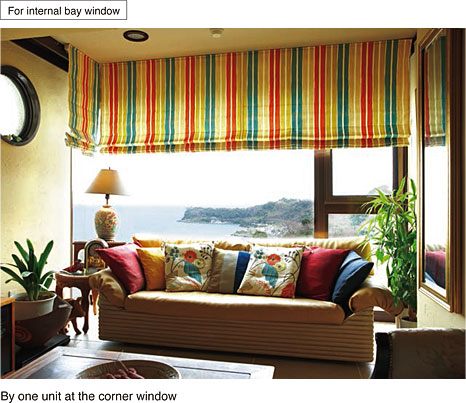
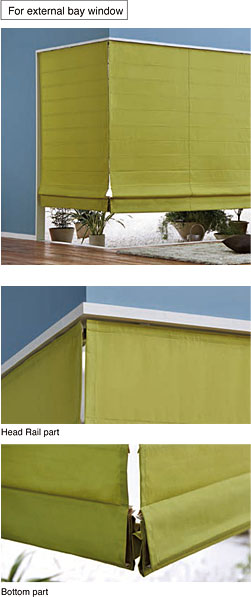
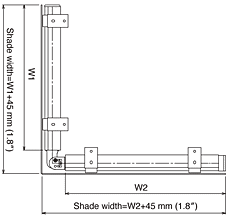
• Corner Separate
One Roman Shade will also work in external or internal bay windows. Possible simultaneous operation for the left and right both Roman Shade.
 |
 |
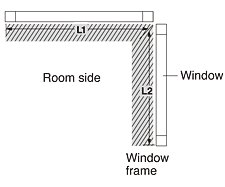
Measuring Method for Corner Windows
| Attachment for the outside of the window flame |
Attachment for the inside of the window flame |
Installation Dimensions | |
 |
 |
 |
|
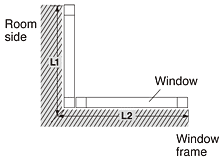 Take measurements from room side, left side is L1, right side is L2. Base point of measurement is rear position of the Bracket. |
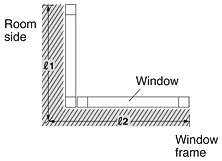 Take measurements from room side, left side is 1, right side is 2. Base point of measurement is front position of the Head Rail. |
 |
|
Allowable Size
| Product Width | Product Height | ||
| Minimum size for one side | Minimum size for both sides | Maximum size for both sides | |
| 300 mm (12″) | 600 mm (24″) | 4,000 mm (158″) | 480–4,000 mm (19–158″) |
Product height is less than 3,000 mm (118″) for either product width is 400–660 mm (16–26″) or less.

